
Actualizare BIOS: funcționează cu aceste instrucțiuni
O actualizare BIOS face adesea minuni pentru un procesor nou sau erori minore. În instrucțiunile noastre, vă vom arăta ce aveți nevoie pentru acest lucru și cum puteți finaliza cu succes actualizarea.
Instrucțiuni: Aflați versiunea plăcii de bază și descărcați actualizarea BIOS
Pentru a găsi actualizarea potrivită pentru placa de bază, trebuie mai întâi numărul exact al versiunii. Dacă nu mai aveți documente de pe placa principală, instrumente precum CPU-Z sau Speccy vă vor ajuta.
- Instalați CPU-Z pe computerul dvs. Windows și porniți programul. Sub fila „Mainboard” veți găsi informații detaliate despre placa de bază.
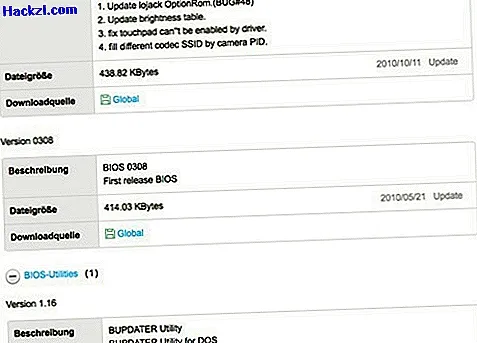
- Pe baza producătorului și a numelui modelului, puteți căuta acum o actualizare BIOS pe pagina principală a producătorului plăcii principale. De asemenea, acordați atenție unui număr de versiune potrivit.
- După ce ați găsit intrarea corectă pentru placa de bază, descărcați două fișiere de pe site-ul producătorului: mai întâi programul cu care puteți „flash” BIOS-ul dvs. (un fișier .exe), iar în al doilea rând cea mai recentă versiune a BIOS-ului în sine ( adesea un fișier .bin). Puneți ambele fișiere într-un folder de pe computer.
- Cu unele plăci principale, puteți efectua actualizarea direct din interfața BIOS. În acest caz, aveți nevoie doar de fișierul actual de BIOS.

Alegeți metoda de actualizare
Când aveți toate fișierele necesare împreună, citiți scurt instrucțiunile producătorului. Există mai multe metode pentru a primi actualizarea în memoria flash BIOS. Acestea variază în funcție de marca plăcii de bază.
- Gigabyte folosește propriul program QFLASH pentru forumurile sale. Cu plăci principale UEFI, trebuie să depuneți ceva mai mult efort: aveți nevoie de un stick USB de pornire și de fișierul BIOS corespunzător cu U1L final.
- Cu toate programele de actualizare DOS (numite și utilități BIOS) aveți nevoie și de un stick USB de boot pe care trebuie să salvați fișierul DOS și fișierul BIOS.
- Unii producători oferă un program Windows pentru a flash flash BIOS-ul dvs. Acesta este cel mai ușor, dar oferă și cel mai mare potențial de erori. Dacă Windows îngheață în timpul procesului de actualizare sau apare o eroare, computerul dvs. nu va mai porni corect.
- Următoarele cazuri se aplică în toate cazurile: o întrerupere a procesului de actualizare asigură că computerul dvs. nu va mai porni data viitoare!
Reînnoiește BIOS-ul în Windows 10 - cum funcționează
Dacă aveți Windows 10 instalat pe computer, procedura de actualizare a BIOS este similară cu cea a versiunilor mai vechi de Windows. Chiar și sub Windows 10, mai întâi trebuie să aflați ce placă de bord este instalată.
- Puteți citi versiunea actuală a BIOS în informațiile sistemului, tastând „msinfo32.exe” în câmpul de căutare.
- Dacă selectați zona „Prezentare generală a sistemului”, veți primi informațiile necesare în „versiunea / data BIOS”.
- Dacă știți ce placă de bază se află în computerul dvs. și ați descărcat actualizarea, continuați cu alte versiuni de Windows.
- Actualizarea pentru succesorul BIOS UEFI este mai ușoară. Porniți UEFI ca BIOS. Apoi puteți utiliza funcția de actualizare a UEFI.
- Numele instrumentului de actualizare în UEFI variază de la producător la producător. La Asus funcția se numește "EZ-Flash", de exemplu, la Gigabyte veți găsi instrumentul de actualizare sub numele "Q-Flash".
BIOS flash folosind USB stick
Dacă doriți să flash flash BIOS-ul dvs. cu un stick USB, pregătiți-l conform instrucțiunilor producătorului și apoi reporniți computerul. Asigurați-vă că citiți instrucțiunile producătorului!
- După repornire, selectați stick-ul USB ca mediu de pornire. Programul BIOS începe fie automat, fie veți termina în promptul DOS "C: \". În acest caz, trebuie să rulați programul manual tastând și confirmând numele fișierului. (Sfat: cu comanda „dir” puteți afișa toate fișierele din director.)
- Acum urmați exact instrucțiunile programului și exact instrucțiunile producătorului. Nerespectarea acestui lucru va duce la un sistem inutilizabil, deoarece BIOS-ul este responsabil pentru începerea completă a sistemului înainte de sistemul de operare.
- Unele procese de actualizare necesită repornirea sau tragerea fișei de alimentare. Urmați acești pași numai atunci când programul vă solicită acest lucru. După finalizarea cu succes a actualizării, puteți începe apoi cu noul dvs. BIOS.
Dacă doriți informații detaliate despre BIOS-ul dvs., asigurați-vă că verificați întotdeauna site-ul producătorului. Un alt sfat practic vă va spune cum să accesați BIOS-ul.